How to add your unlisted inventory to Flipwise
To add unlisted inventory to your Flipwise store, click on "Unlisted" in the main navigation under "Inventory."
Click the green "+ New" button in the top right hand corner.
For each unlisted item in your inventory, you can add the following values:
- Purchase date
- Purchase location
- Purchase price
- Storage location
- Product name (required)
- Quantity
Selecting "Save and add another?" will keep the pop up open and allow you to quickly enter multiple items at once.
Selecting "Copy acquisition data to next product?" will retain your already-entered acquisition data to the next product you're adding so that you don't have to enter the same information multiple times.
Set a default storage location for unlisted items
Additionally, if you store your unlisted inventory in the same physical location, you can set a default storage location to be used for all of your unlisted inventory. Navigate to Manage > Storage Locations and click into the storage location you want to set as the default. Click the three-dot action button and select "Set as default for unlisted."
Connecting an unlisted item to a new listing
Once an item in your unlisted inventory is listed, you can connect it to its listing so that you don't need to re-enter your acquisition data.
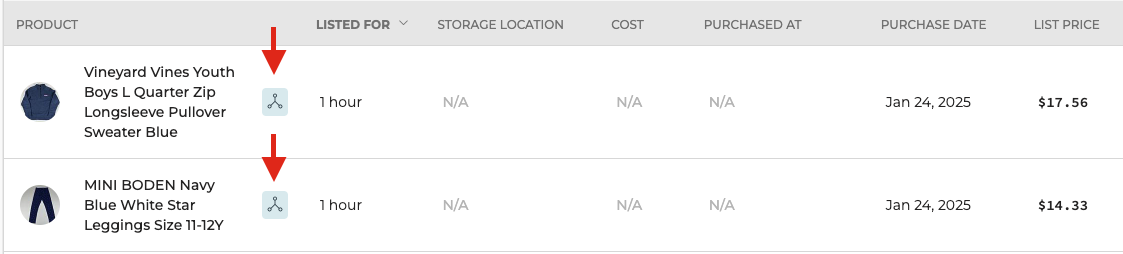
To make the connection, click the "Connect" button from the Unlisted inventory index:

Please note: if the listing already contains acquisition data, it will be overwritten during the connection process. But if the listing has acquisition data defined for it that the unlisted item does not, the listing’s data will be retained after a connection is made. (Example: an active listing has a cost of $5 but the Unlisted item does not have a cost defined; the cost of $5 will be retained after the connection is complete.)
Connecting a new listing to an unlisted item
Additionally, you can make the connection in the reverse. Once an item is listed, go to your Inventory > Active or Inventory > Missing Data index views and look for the connect icon. Clicking this will allow you to connect the new listing to an unlisted item in your inventory.
This connect icon will only appear next to listings published in the last 48 hours. Additionally, if a listing has already been connected to an unlisted product, or if you have entered any acquisition data (except for storage location) for the listing, the connection icon will not appear.
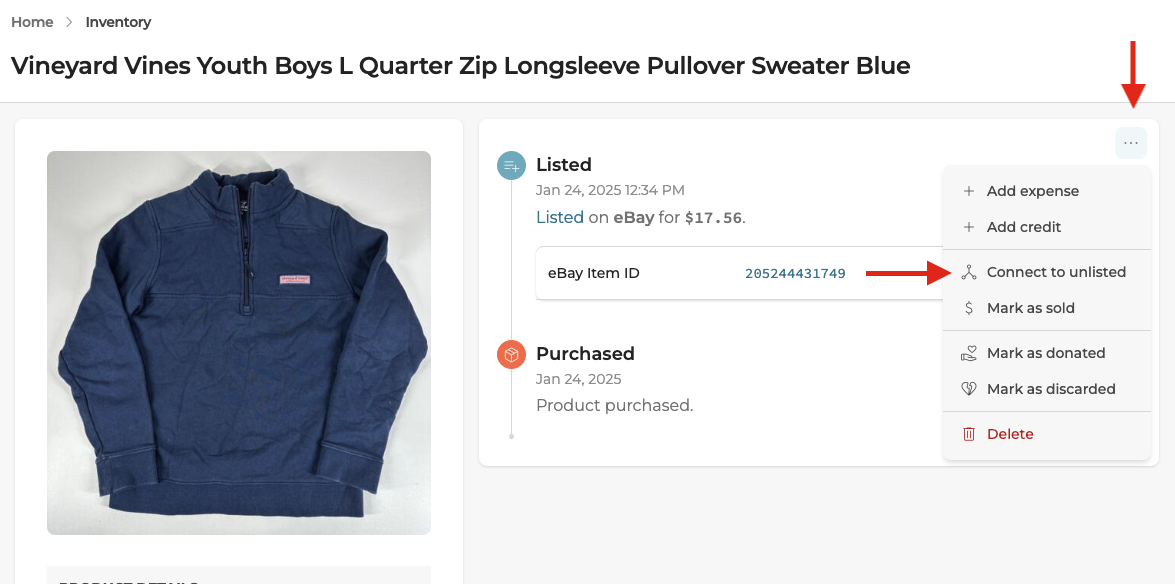
Even if the icon does not appear for a listing on the Active screen, you can connect a listing to an unlisted product from the listing's detail page. Click the three-dot action menu and select "Connect to unlisted."
NEW: Import your Unlisted Items with a CSV file
We can now help you add Unlisted items in bulk with a CSV file. Read here to see how that process works: